Content code
m1220
Slug (identifier)
the-construction-of-a-height
Parent content
Grades
Secondary I
Secondary II
Topic
Mathematics
Tags
base of the triangle
compass
vertex
height
sharp point of a compass
sharp point
construction
drawing a height
representing a height
constructing a height
sketching a height
how to sketch a triangle’s height
Content
Contenu
Content
Corps

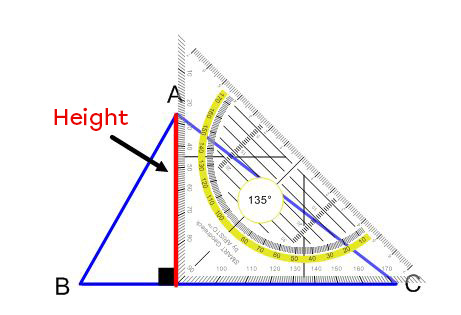
A height is a line segment that connects a vertex to its opposite side and is perpendicular to the opposite side.

Corps

A triangle’s height can be drawn two ways:

Links
Content
Corps

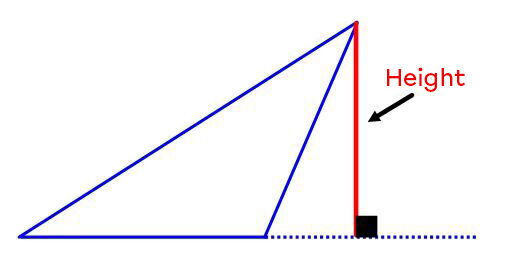
Sometimes a triangle’s height is located outside of the triangle itself.
Image
Triangle
Title (level 2)
Compass and Ruler Method
Title slug (identifier)
compass-and-ruler
Contenu
Corps

We can use a compass and ruler to sketch a triangle’s height by following these steps:

Surtitle
Règle
Content
Corps
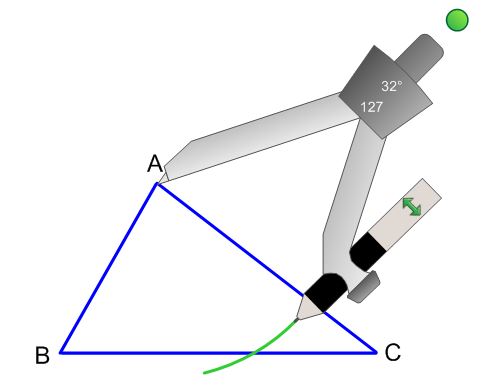
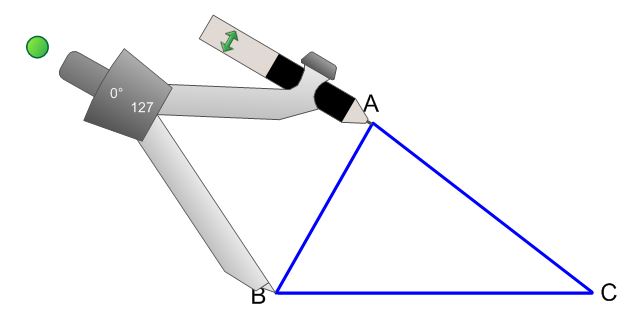
  1. Open the compass so that its opening is equal to the distance between the triangle’s vertex where the height will come from and another vertex of the triangle. Keep the same open setting for every stage of the construction.

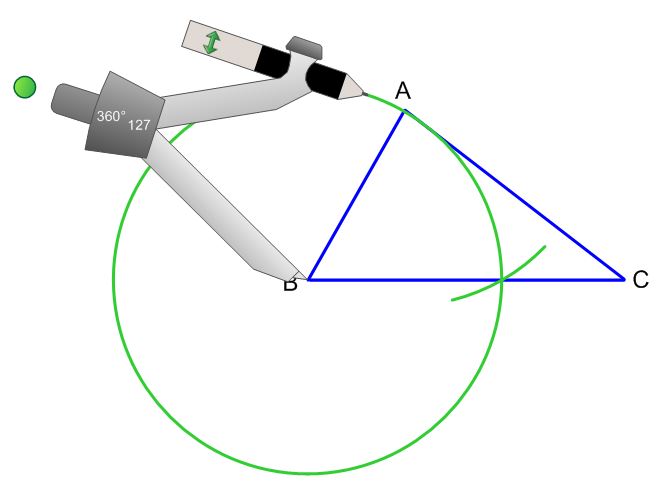
  2. Place the compass’ sharp point on the top of the triangle where the height will come from and draw an arc that intersects the triangle’s base. This gives a new point.

  3. Place the compass’ sharp point on the end of the triangle’s base used in step 1 and draw a circle passing through the point found in step 2.

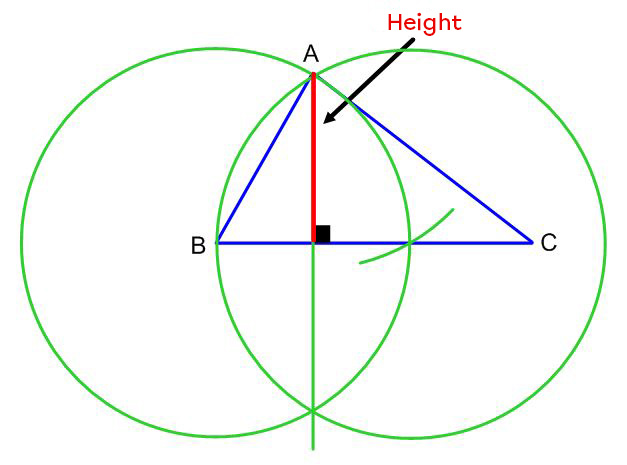
  4. Place the compass’ sharp point on the point found in step 2 and draw a circle of the same size.

  5. Using a ruler, connect the intersections of the two circles. The part of the straight line inside the triangle corresponds to its height.
Corps
  1. Open the compass so that its opening is equal to the distance between the triangle’s vertex where the height will come from (vertex A) and another vertex of the triangle (vertex B). Keep the same open setting for every stage of the construction.

Compas
  1. Place the compass’ sharp point on the top of the triangle where the height will come from (vertex A) and draw an arc that intersects the triangle’s base. This gives a new point.

Compas
  1. Place the compass’ sharp point on the end of the triangle’s base used in step 1 (vertex B) and draw a circle passing through the point found in step 2.

Compas
  1. Place the compass’ sharp point on the point found in step 2 and draw a circle of the same size.

Compas
  1. Using a ruler, connect the intersections of the two circles. The part of the straight line inside the triangle corresponds to its height.

Compas
Content
Corps

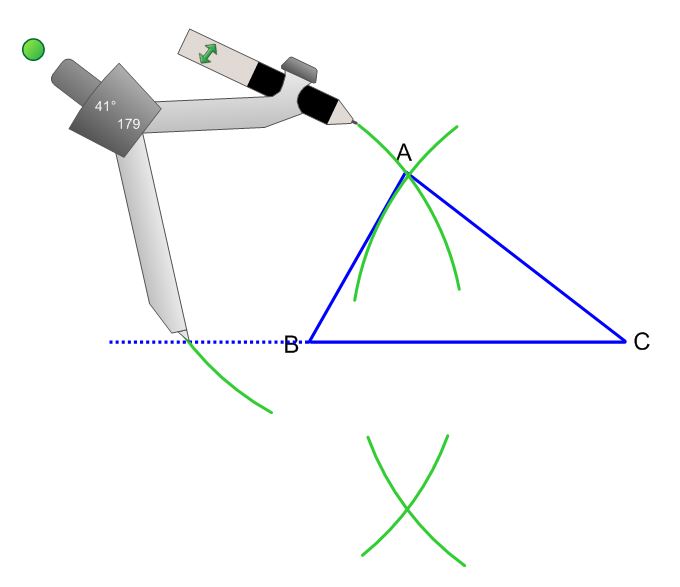
The technique could also be performed from the other side of the triangle. The point found in step 2 would be on the extension of the triangle’s base.

Triangle Triangle Triangle
Title (level 2)
Set Square Method
Title slug (identifier)
set-square
Contenu
Corps

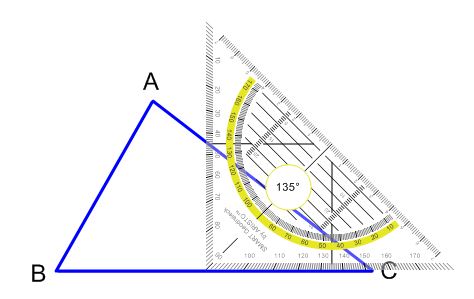
We can use a ruler to draw the triangle’s height by following these steps:

Surtitle
Règle
Content
Corps
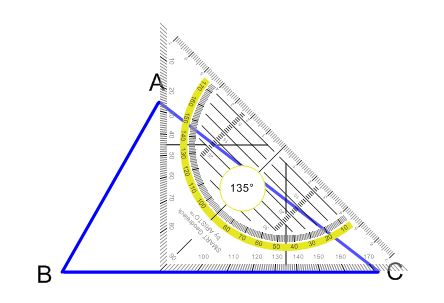
  1. Place one side of the set square’s right angle on the triangle’s base.

  2. Line up the other side of the set square’s right angle with the top of the triangle.

  3. Draw the segment that starts from the vertex and intersects perpendicular to the triangle’s base. This segment is the triangle’s height.
Corps
  1. Place one side of the set square’s right angle on the base of the triangle.

Triangle
  1. Line up the other side of the set square’s right angle with the triangle’s vertex.

Triangle
  1. Draw the segment that starts from the vertex and intersects perpendicular to the triangle’s base. This segment is the triangle’s height.

Triangle
Title (level 2)
Video
Title slug (identifier)
video
Contenu
Remove audio playback
No