Central projections are ideal for accentuating the depth effect of images and solids.
A central projection is the representation of an object in 3-D with respect to the horizon line (identified by one or more vanishing points) and to the position of the object in space in relation to the observation point.
The major advantage of central projections is that they enable a solid to be realistically represented on paper. In this type of projection, the horizon line and the position of the object in space relative to the position of the observer are respected. In other words, the further the object is from the observer, the smaller it is.
Bien que les murs d'un tunnel (photo à gauche) soient parallèles en réalité, ils semblent converger vers le même point (le point de fuite).
Sur la photo de droite, cette « illusion d'optique » est utilisée afin d'apporter un effet de profondeur à l'image produite.
Although the walls of a tunnel (left photo) are parallel in reality, they seem to converge towards the same point (the vanishing point).
In the bottom picture, this “optical illusion” is used to create a depth effect in the image produced.
Although the walls of a tunnel (left photo) are parallel in reality, they seem to converge towards the same point (the vanishing point).
In the bottom picture, this “optical illusion” is used to create a depth effect in the image produced.
Central projections are closely related to dilations, where the vanishing point serves as the centre of dilation. Since some faces are proportional, it is possible to infer the measures on a central projection using the scale factor or similarity ratio.
With this perspective, the edges that define the depth of a solid converge towards one vanishing point on the horizon. As such, the face represented in the frontal plane is not distorted in relation to reality, but all the others are.
-
Draw the desired base in the frontal plane and the vanishing point.
-
Draw the vanishing lines.
-
Draw the furthest base.
-
Complete the solid.
Draw the central projection of a trapezoidal prism using a one vanishing point perspective.
Select and move the vanishing point to see its impact on the final result.
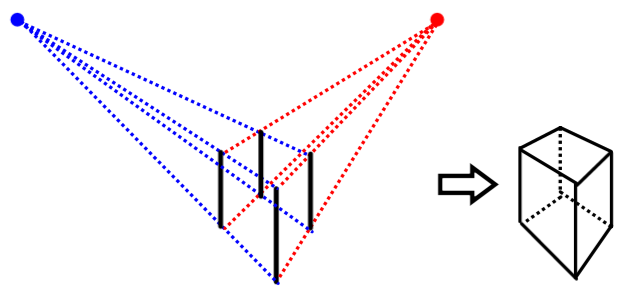
In a perspective with two vanishing points, the edges associated with one dimension of the solid converge towards a vanishing point located on the horizon line, and the edges associated with another dimension converge towards another vanishing point located on the same horizon line.
-
Draw the first reference point.
-
Draw the vanishing lines.
-
Draw more vertical edges.
-
Draw other vanishing lines.
-
Draw the last vertical edge.
-
Complete the solid.
-
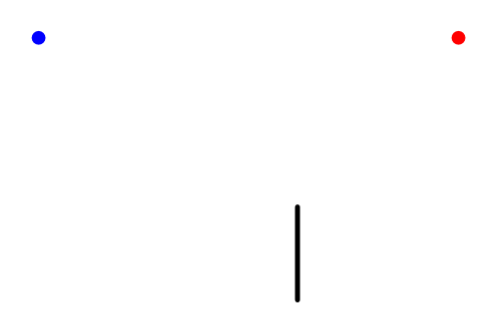
Draw the first reference point.
In this case, draw the vertical edge of the solid closest to the observer. In addition, the 2 vanishing points can be provided or drawn arbitrarily. In either case, they must be on the same horizontal line since they define the horizon.
-
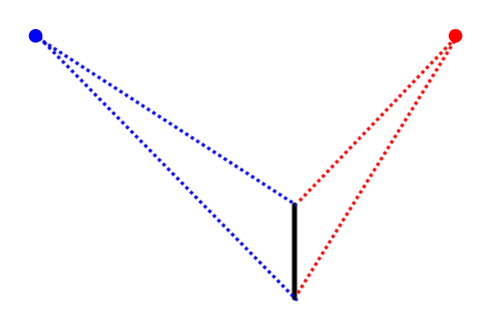
Draw the vanishing lines.
Draw vanishing lines joining the vanishing points at each endpoint of the vertical edge.
-
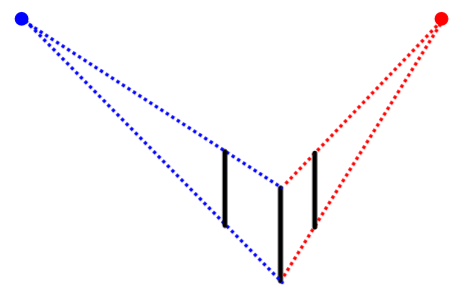
Draw more vertical edges.
Draw two vertical edges parallel to the one already drawn, staying within the limits of the vanishing lines.
-
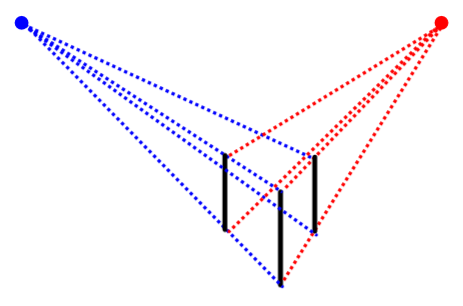
Draw other vanishing lines.
Draw vanishing lines joining the vanishing points at each endpoint of the new vertical edges.
-
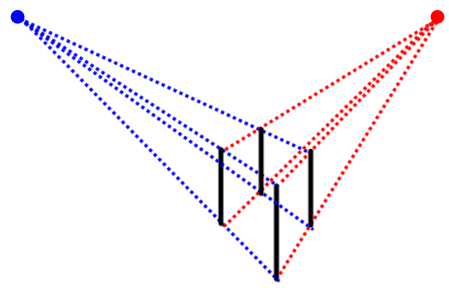
Draw the last vertical edge.
Draw the furthest edge from the observer, the one formed by the intersection of the new vanishing lines, while respecting the limits of the vanishing lines and the parallelism with the other vertical edges.
-
Complete the solid.
Draw the solid by erasing unnecessary vanishing lines and using dotted lines to identify edges that are not visible in reality.
