In technical drawing, the scale indicates the relationship between the dimensions of an object on a drawing and its actual dimensions.
Technical drawing is used to convey precise information about an object for the purpose of its manufacture or its analysis. It is therefore important to display the dimensions of the object in the drawing. Some objects are simply too big or too small for all of their details to be clearly shown on a drafting sheet. This is why the scale used to make the drawing of an object should always be indicated.
The scale is displayed in the title block as follows.
Dimensions of the drawn object:Actual dimensions of the object
The actual length of an object is |30| cm. In a drawing, this same length is represented by a |15| cm line. The title block then indicates that the drawing is represented on a 1:2 scale, meaning that each centimetre on the drawing is equivalent to |2| cm on the object.
Depending on the actual size of the object, it may be necessary to increase or decrease its dimensions in order to improve the clarity and precision of its drawing. We can represent an object according to 3 different types of scales.
Regardless of the type of scale used, the dimension values written on the drawing must correspond to the actual dimensions of the object.
Sometimes, the actual dimensions of an object are too large to be drawn on a drafting sheet. In this case, we have to reduce its dimensions while maintaining its proportions. To do this, we use a reduction scale.
Since a bookshelf is too large to be drawn on a drafting sheet, it is represented in the following example in multiview and isometric projection on a 1:8 reduction scale.

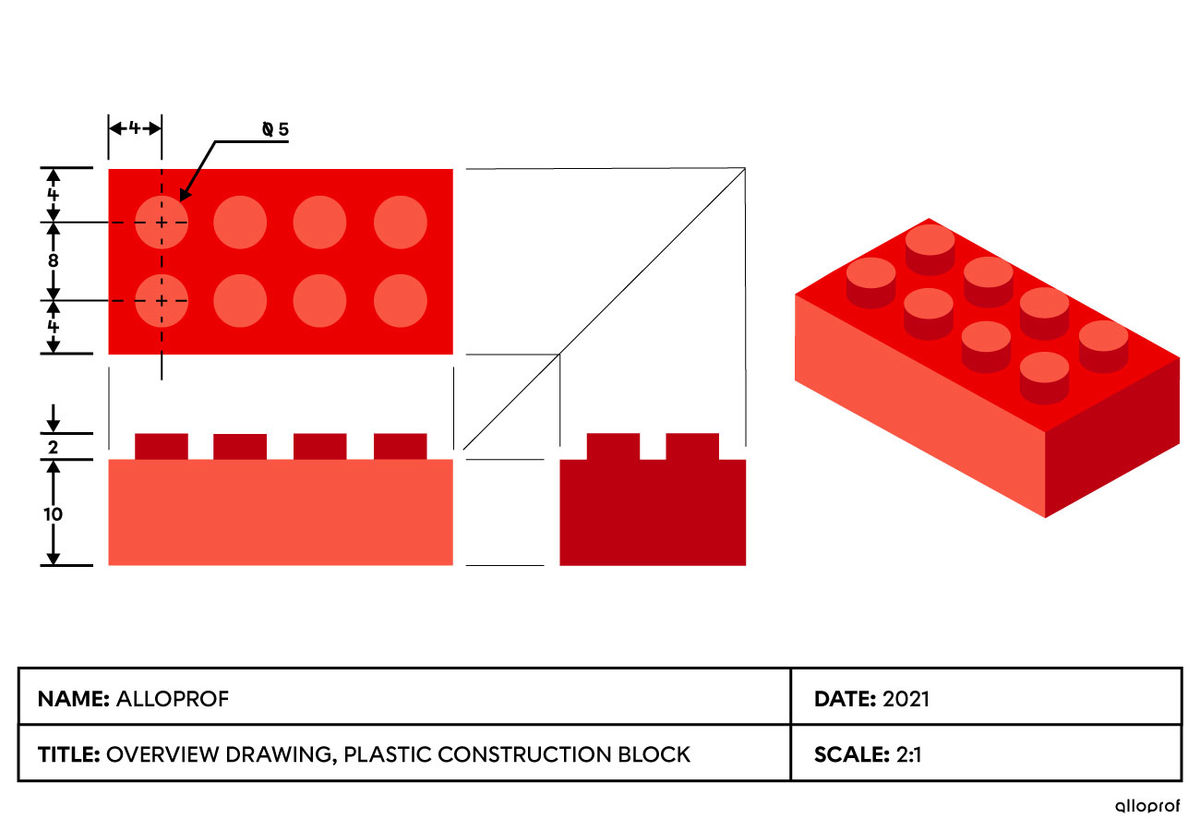
When the actual dimensions of an object are too small to clearly illustrate all of its details on a drawing, we need to increase its dimensions while maintaining its proportions. To do this, we use an enlargement scale.
Since a plastic building block is too small to enable us to clearly illustrate its dimensions and details, the following example shows it in multiview and isometric projection on a 2:1 enlargement scale.

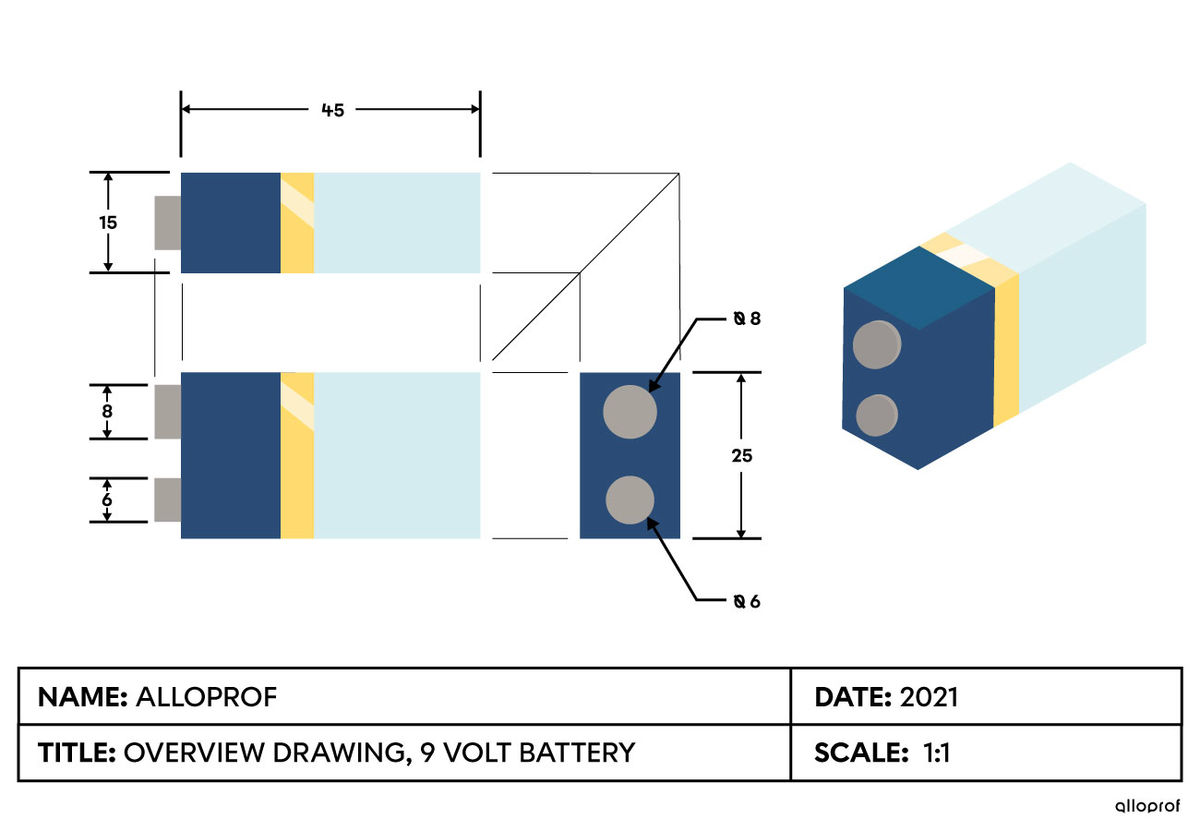
When the actual dimensions of an object are appropriate to be represented on a drafting sheet, use a 1:1 actual size scale (or “true size” scale). The dimensions measured on the drawing then correspond to the real dimensions of the object.
Since the actual dimensions of a 9 V battery allow it to be drawn with all its details clearly visible, it is shown in the following example in multiview and isometric projection in a 1:1 actual size scale.
