The multiview projection is a two-dimensional representation of different views of an object. Each view corresponds to one of the faces of the object.
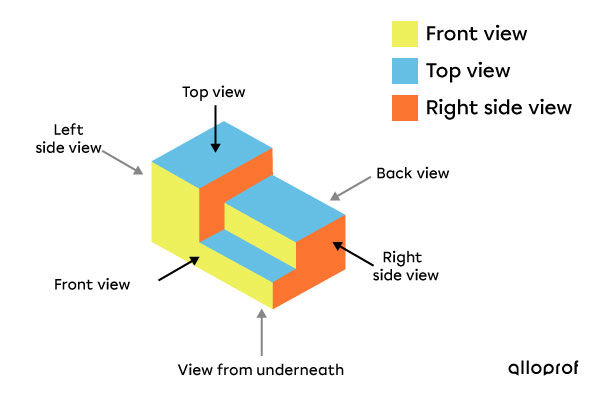
All objects can be observed from six different angles: back, front, right, left, top, and bottom. These viewing angles are known as the views of an object. Combining three of these views gives a general idea of the shape of an object.
The arrows on the following isometric drawing indicate the different views of an object.
In order to graphically represent each view of an object, we can imagine this object in the centre of a transparent cube. Through observing the six faces of the cube, we can see the six faces of the object. Therefore, each view of the object becomes a two-dimensional projection onto the faces of the cube.
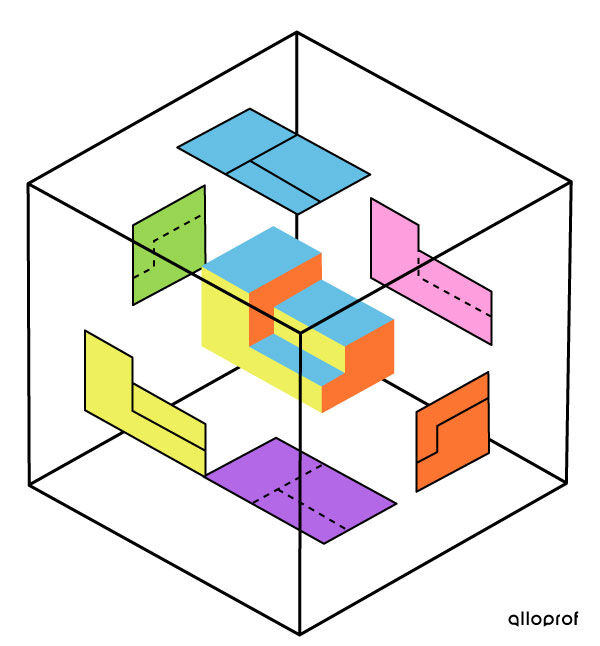
When representing an object in multiview projection, it is not necessary to present all six views of that object. To display the characteristics and dimensions of the object, three views are sufficient. The views chosen must show all the characteristics of the object.
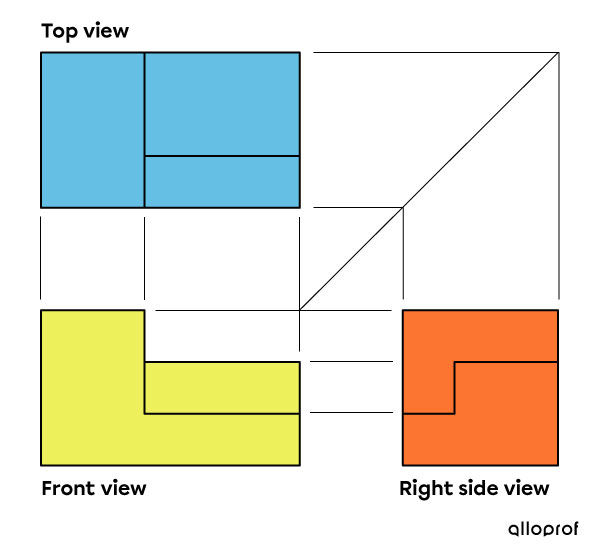
Conventionally, front, right, and top views are used. Thus, on the drafting sheet, to the right of the front view, we draw the right view. Subsequently, the top view can be drawn above the front view, as in the following image. It can also be drawn above the right side view.
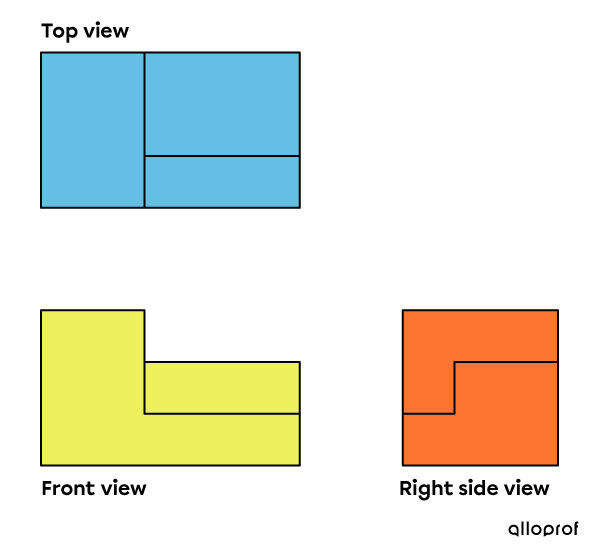
Construction lines connecting the vertices of the object can be added to compare more accurately the dimensions of the different views.
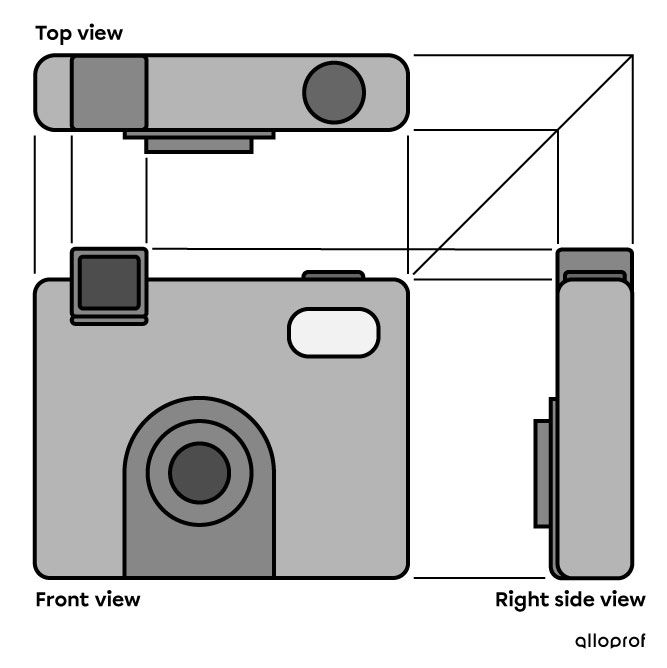
It may happen that certain lines are hidden in one of the chosen views. If this is the case, these lines will be represented by dotted lines, according to the basic lines.
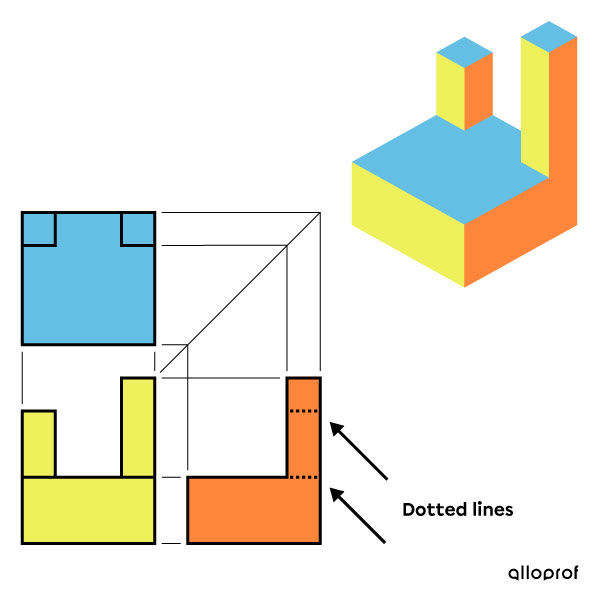
In a multiview projection, the views of the object are always shown parallel to the drafting sheet. Therefore, this type of projection offers a two-dimensional view that is not distorted by the illusion of perspective. However, the third dimension, that of depth, is not represented in this type of projection.
Multiview projection is used to clearly illustrate all the details and dimensions for the assembly and manufacturing of a complex object.
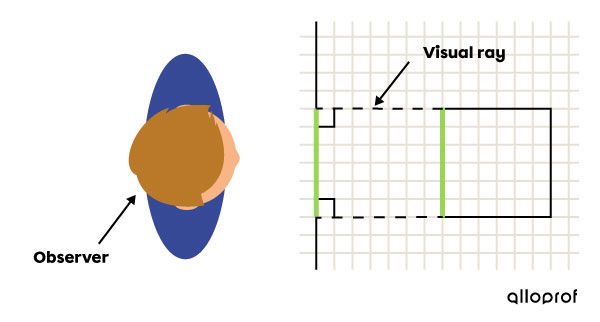
Multiview projection, like isometric projection, is part of the broad category of orthogonal projections, that is, all the visual rays starting from the vertices of the object are directed perpendicularly towards the observer positioned in front of the drafting sheet. As a result, the multiview projection allows all actual or scaled measurements of the object to be shown. All angles are also accurate.
