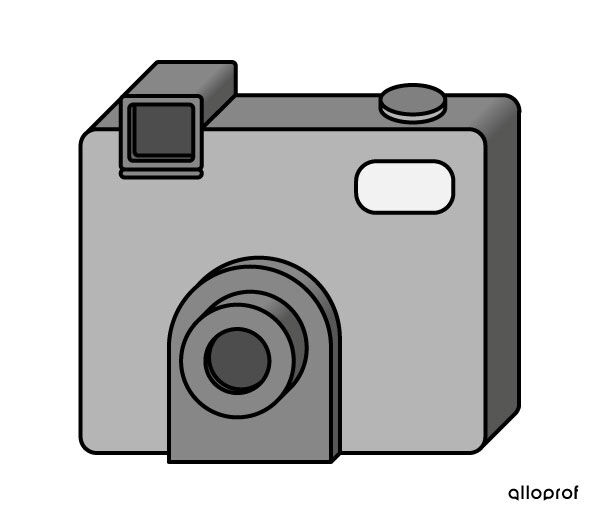
The oblique projection is the perspective representation of an object positioned so that one of its faces is parallel to the drafting sheet and the depth is obtained by drawing oblique lines parallel to each other.
Like in isometric projection views, oblique projection is used to represent the three dimensions of an object. However, in oblique projection, one of the faces of the object must be parallel to the plane of the drafting sheet, unlike in the isometric projection where no face is parallel to the plane.
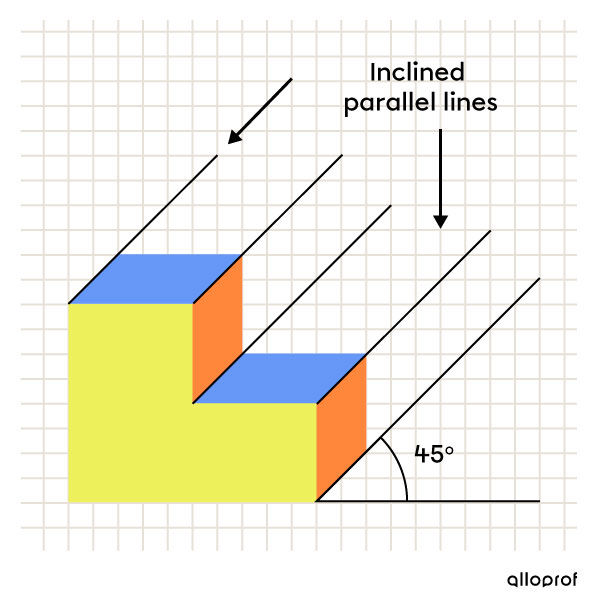
To draw an oblique projection, the object's face with maximum details must be chosen as the one parallel to the plane of the drafting sheet. In order to represent the depth dimension of the object, lines parallel to each other are drawn from each of the vertices of the object. These parallel lines are inclined to form angles of |30^\circ| or |45^\circ| with the drafting sheet. Regular grid paper is suitable for plotting this type of projection.
The front view (in yellow) is parallel to the drawing plane. This face of the object is shown with its actual dimensions, as opposed to the depth dimensions, which are in perspective. The oblique parallel lines in this type of projection help produce a more realistic effect.


In technical drawing, oblique projection is often used to draw a three-dimensional representation quickly without using drawing instruments. Although it is not completely accurate in terms of proportions of an object, oblique projection provides a more realistic effect. This type of projection is used in architecture and design, or when sketching an object to be manufactured.
In an oblique projection, parallel and oblique lines starting from the vertices give the object’s dimension of depth.
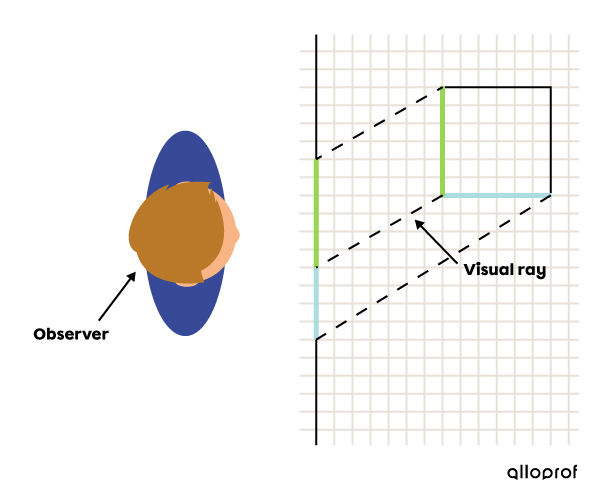
Therefore, the face of the object that is parallel to the plane of the drafting sheet shows all of its actual or scaled measurements and the exact measurement of its angles. In contrast, the measurements associated with the depth dimension of the object are distorted by the illusion of perspective. These measurements of sides and angles do not reflect the actual dimensions of the object; they appear reduced.
In isometric projections and multiview projections, the actual dimensions of the object are preserved, unlike in oblique projections. Refer to the concept sheet on the types of projections used in technical drawings to compare them.
Oblique projection, unlike multiview projection and isometric projection, does not fall under the category of orthogonal projections. Since, in an oblique projection, all of the visual rays starting from the vertices of the object do not point perpendicularly to an observer positioned in front of the sheet, the criteria for orthogonal projection are not met. Therefore, the dimensions of the drawing are not proportional to those of the actual object.
